
Anime
Cat Girl, Fox Girl, Wolf Ears: Designing a Kemonomimi Character

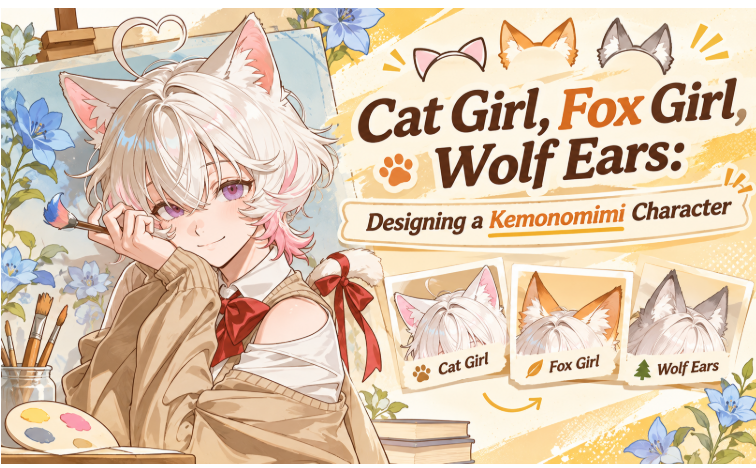
Kemonomimi character design starts with a mostly human figure and animal features, usually ears and sometimes a tail. The appealing part is also the difficult part: a small change to the silhouette has to feel connected to the whole person. Choose the anatomy before choosing accessories.
If you’re asking “what is a kemonomimi,” the Japanese term refers to animal ears and is also used for characters with those features. For practical character design, the kemonomimi meaning is narrower than a fully animal-bodied humanoid. Furry is a broad community and creative label that can overlap with either approach; neither category is a measure of quality or imagination.
Cat Girl: Build the Design Around Small, Mobile Shapes
An anime cat girl often uses compact triangular ears, a human face, and a long flexible tail. Decide how rounded the ear tips should be and how much fur breaks the outer edge. A smooth triangle and a tufted triangle suggest different materials even in silhouette.
A neko girl design doesn’t need cat-themed details on every garment. Keep the clothing connected to a daily role, then let the ears and tail identify the animal influence. A bicycle messenger might wear an ordinary jacket with a bag strap positioned away from the tail.
Playfulness or independence can be useful personality conventions, but they aren’t built into the anatomy. A cautious librarian with cat ears is as workable as a restless athlete. Give the person a task and an expression that reveal who they are.
Starting prompt:
An original adult cat-eared bicycle messenger has a short charcoal bob, green eyes, and compact triangular charcoal ears with pale gray inner fur. One long charcoal tail curves beside the hip. She wears a yellow rain jacket and carries a plain canvas delivery bag. Waist-up three-quarter view, ears fully visible, human ears absent, tail emerging from the lower back and visible beside the body, thoughtful expression, simple street background.
Keep the tail’s curve readable beside the body. If it crosses the bag strap, jacket hem, and arm at the same point, simplify the pose before adding more fur detail.
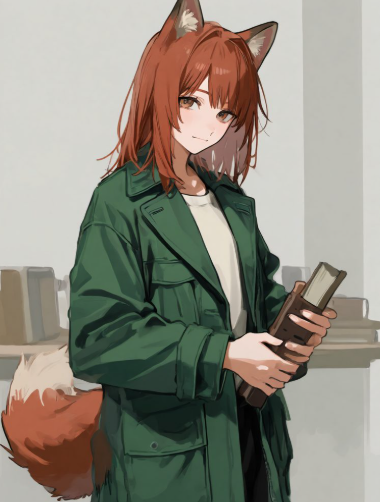
Anime Fox Girl: Give the Ears and Tail Enough Space
This type usually needs more room around the head and body than the cat version. Taller triangular ears and a fuller tail create a broader outline. Check the width at the base of each ear; long thin points alone can read as a different animal.
Warm orange with cream accents is a familiar option for a fox-inspired character, but a gray or dark palette can work as well. Record where each color changes. “Cream inner ears and a cream tail tip” is repeatable; “fox colors” leaves those boundaries open.
Cleverness and mischief are common story associations. You can use them, or give the character a direct, patient manner. A large tail already supplies plenty of visual interest without requiring a sly expression in every portrait.
Try this starting prompt:
An original adult fox-eared bookbinder has shoulder-length rust-colored hair, brown eyes, and tall triangular rust-colored ears with cream inner fur. One broad rust-colored tail has a clearly defined cream tip. She wears a dark green work coat over a plain shirt and holds a closed clothbound book. Waist-up three-quarter composition, tail curving into view beside the torso from the lower back, human ears absent, patient expression, plain warm-gray background.
Avoid hiding the whole ear base under the hair. A visible point of attachment helps the design feel intentional, particularly when you later need a side view.
Wolf Girl: Use Structure Before Adding Shaggy Fur
For an anime wolf girl, try broader upright ears with a rounded transition at the tips and a full tail carried lower than the fox version. These are design choices, not strict zoological boundaries. Ear proportions and markings need to work together because stylized triangles alone can be ambiguous.
Gray, cream, and muted brown make a useful starting palette. Darker outer ear edges can tie into the hair, while a lighter inner patch keeps the ear readable. Avoid turning every contour into scattered spikes; a stable outline is easier to repeat.
Protectiveness and reserve are familiar conventions for this type. A cheerful wolf-eared baker can be equally clear if the animal features stay coherent. Expression belongs to the individual character, not the species label.
Starting prompt:
An original adult wolf-eared mountain guide has short ash-brown hair, gray eyes, and broad upright ears with softly rounded tips, dark outer edges, and cream inner fur. One full gray-brown tail hangs behind the hip. She wears a blue hiking coat with a plain scarf and holds a folded trail map. Waist-up three-quarter view with the tail visible beside the torso, human ears absent, welcoming expression, uncluttered pale background.
Other Kemonomimi Types to Consider
Think about what the animal feature changes in the silhouette before expanding the wardrobe. Long rabbit ears need space above the head; rounded bear ears can disappear into a thick hairstyle. Antlers require a different attachment and spacing plan from ears, so treat a deer-inspired design as a related variation rather than simply swapping triangles.
| Type | Ears | Tail | Common palette | Key prompt wording |
| Cat | Compact triangles | Long and flexible | Charcoal, cream, orange, or tabby markings | Small triangular ears, one long tail |
| Fox | Tall triangles with broad bases | Full, often with a contrasting tip | Rust and cream, gray, or dark brown | Tall triangular ears, one broad tail, defined tip color |
| Wolf | Broad upright shapes | Full, often carried low | Gray, cream, muted brown | Broad ears, thick low-held tail |
| Rabbit | Long upright or drooping shapes | Small rounded tail | White, brown, gray | Long ears with visible bases, small round tail |
| Dog | Upright or folded, depending on the design | Curled, straight, or full | Tan, black, white, mixed patches | Folded ear tips, one curled tail |
| Tanuki | Small rounded ears | Full tail | Brown with cream and dark accents | Rounded brown ears, full brown tail, dark facial accents |
| Bear | Rounded ears near the crown | Short rounded tail | Brown, black, cream | Small round ears, short tail, compact fur edges |
| Deer-inspired | Long ears, with optional antlers | Short tail | Tawny, cream, brown | Long lateral ears, separate antler bases, short tail |
Settle the Anatomy Before the Outfit
One pair of ears or two. Either arrangement can be a deliberate fictional choice. Decide whether human ears remain visible and put that decision in the character sheet. Hair covering the sides of the head is different from a design that has no human ears.
Inner ear color. Name the patch, its border, and whether it repeats the tail’s underside. A close-up should still match the wide view. Don’t let a dramatic light become a permanent pink patch in the next description.
Tail attachment. Specify that it emerges from the lower back around the base of the spine. Then plan how the coat or waistband accommodates it. In a waist-up portrait, the tail may curve into view, but its apparent origin shouldn’t be the shoulder or the side of the rib cage.
Hair and fur. Matching colors can unify the head; contrasting colors can separate the ears from the hairstyle. Choose the relationship explicitly. Ear tufts should remain distinct from bangs so the next image doesn’t turn them into extra hair spikes.
Everyday objects also need a plan. A hat can sit between the ears or include openings; a hood needs enough room for the chosen shape. Record that construction if the item appears often.
Keep One Kemonomimi Character Consistent Across Images
Write a fixed description containing ear size, tip shape, inner color, tail count, tail markings, and human-ear visibility. Add hair and eye details after those decisions. Keep this description separate from the scene, pose, and clothing changes.
A front view alone won’t settle the tail attachment or ear angle. Add a side view and a rear view, then compare them before using the sheet as a reference. Check that a white tip stays the same length and that the ear bases occupy the same part of the head.
Start the first scene change with a simple pose. If both the coat and the tail become ambiguous, reduce overlap and correct the anatomy before moving to an action scene. Save a clear neutral reference instead of treating the most elaborate illustration as the master design.
Where PixAI Fits
PixAI is an anime-focused option for exploring these original characters, with more than one way to keep a kemonomimi design stable once the first image works.
The kemonomimi ear and tail consistency guide addresses prompt wording, references, and LoRAs. The beginner character consistency methods are useful when other features drift between scenes.
For a long-running character, you can train a character LoRA from your own images. The neutral front, side, and rear references described above make a steadier training set than a handful of elaborate scenes, because the ears and tail stay unobstructed in each one. Keep checking the specific ear and tail markings against the character sheet afterward.
Before This Character Gets a Second Scene
- Animal features stay identifiable in silhouette.
- Specify whether the head has human ears as well.
- The inner fur and tail markings have fixed boundaries.
- Check the lower-back attachment and any clothing opening.
- Front, side, and rear references agree on proportions.
- Keep the character’s personality separate from animal stereotypes.
Choose one design and explore a neutral reference on PixAI before moving the character into a busier scene.



Cat Girl, Fox Girl, Wolf Ears: Designing a Kemonomimi Character

From The Price Is Right to Crypto Games

Online games with cryptocurrencies — what does the gameplay look like?

This New Fall Romance Anime Will Make You Fall in Love!

How Does AI Marketing Increase the Reach of Gaming Blogs?

What It Takes to Stream One Game to Hundreds of Screens at Once

Best DNS Servers for Gaming in 2026: 6 Options for Speed and Stability

How to Grow a Gaming TikTok From Zero in 2026: 8 Steps

The Most Popular Car Game Isn’t Where Players Stay Longest

ARC Raiders Frozen Trail Guide: How to Board and Clear the Frigate

Rockstar Games Integrates Advanced Ray Tracing for GTA VI

Mystery Anime You’ll Regret Starting at Midnight | Part 2

How to Update Outdated Graphics Drivers for Better Gaming Performance and Higher FPS

How to Recover Lost Game Files from an External Drive on Mac

Steal a Brainrot Items Guide: How to Get Rare Brainrots and Build a Stronger Base

A Must watch Wholesome Anime That Feels Surprisingly Relatable!
-
 Features4 weeks ago
The Most Popular Car Game Isn’t Where Players Stay Longest
-
 Features3 weeks ago
ARC Raiders Frozen Trail Guide: How to Board and Clear the Frigate
-
 Gaming News4 weeks ago
Rockstar Games Integrates Advanced Ray Tracing for GTA VI
-
 Anime3 weeks ago
Mystery Anime You’ll Regret Starting at Midnight | Part 2
-
 Technology4 weeks ago
How to Update Outdated Graphics Drivers for Better Gaming Performance and Higher FPS
-
 Technology3 weeks ago
How to Recover Lost Game Files from an External Drive on Mac
-
 Features2 weeks ago
Steal a Brainrot Items Guide: How to Get Rare Brainrots and Build a Stronger Base
-
 Anime2 weeks ago
A Must watch Wholesome Anime That Feels Surprisingly Relatable!
-
Features2 weeks ago
The Parent Companies Behind Your Favorite Games
-
 Social Media1 week ago
How to Grow a Gaming TikTok From Zero in 2026: 8 Steps
-

 Technology1 week ago
Level Up Your Audio: How to Score the Next Big Indie Game from Your Bedroom
-

 Features3 weeks ago
Table and Mini Games In Grand Theft Auto 6 – What Can We Expect?